How Often to Seal an RV Roof: A Practical Maintenance Guide
Why RV Roof Maintenance Matters
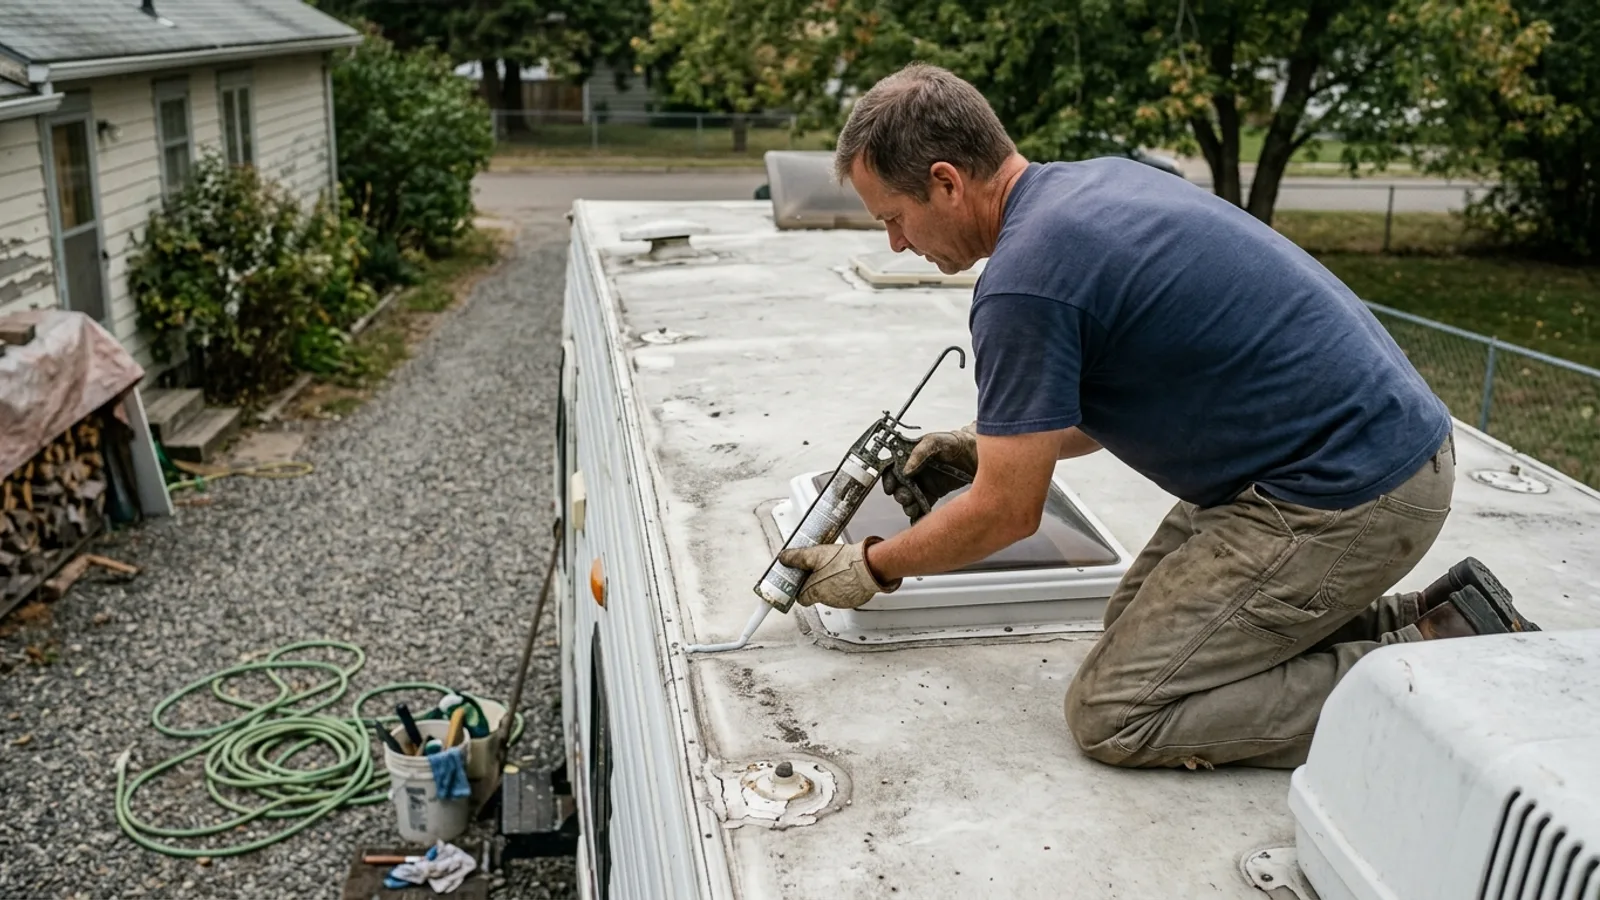
An RV roof takes more abuse than almost any other part of the vehicle. It sits in direct sun for hours at a time, flexes as the vehicle moves, and collects rain, snow, and debris. Most roofing materials are built to shed water and resist UV light, but the seams, vents, skylights, and edge trim are the weak points. Sealant around these areas breaks down long before the roof membrane itself does.
Once a seal fails, water can travel along the roof structure and show up as a stain or soft spot far from the actual leak. By the time you see damage inside the RV, the wood framing or interior panels may already be affected. Regular inspection and timely resealing is much cheaper and easier than repairing water damage after the fact.
How Often to Inspect the Roof
Check the roof at least twice a year, and add an inspection after any severe storm, hail event, or long stretch of driving on rough roads. A simple visual and hands-on check takes only a few minutes and can catch problems before they become expensive.
During an inspection, walk the roof carefully if it's rated for foot traffic, or check it from a ladder if it isn't. Look closely at:
- Seams around vents, air conditioners, antennas, and skylights
- The edge trim where the roof meets the RV's side walls
- Any area where sealant looks chalky, cracked, or has pulled away from a surface
- Low spots where water might pool instead of draining off
How Often to Reseal
There's no single interval that fits every RV, because sun exposure, climate, and storage conditions vary widely. As a general guideline, plan to recoat or spot-reseal the roof every two to four years. RVs stored outside in strong sun, extreme heat, or a harsh winter climate will need attention on the shorter end of that range. RVs kept under cover or in a mild climate can often go longer between full recoats.
Spot repairs don't have to wait for a scheduled recoat. If you find a cracked seam or a gap during a routine inspection, reseal that specific area right away rather than waiting for the next full maintenance cycle.
Signs Your Roof Needs Attention
Some warning signs are visible from outside:
- Cracking, chalking, or peeling in the sealant around seams and fixtures
- Soft or spongy spots when you press on the roof surface
- Rust or corrosion on metal roof components or fasteners
- Sealant that has visibly shrunk or separated from an edge
Other signs show up inside the RV:
- Water stains or discoloration on the ceiling or upper walls
- A musty smell, or visible mold and mildew near the ceiling
- Noticeable drafts or temperature swings that suggest air is leaking through the roof
Any of these signs, especially interior water stains, warrant a closer look and prompt repair. Water damage tends to spread quietly inside wall and ceiling cavities before it becomes obvious.
When and How to Apply Sealant
Timing and conditions affect how well a sealant cures and how long it lasts:
- Time of day: Work in the cooler parts of the day, such as early morning or late afternoon, rather than in direct midday sun. A hot roof surface can cause the coating to skin over before it bonds properly.
- Weather: Choose a dry stretch of days with low humidity. Moisture on the surface or in the air interferes with adhesion and curing, and most products need a rain-free window to set up properly.
- Surface prep: Clean the area thoroughly and let it dry completely before applying anything. Remove old, failing sealant rather than coating over it, since new product won't bond well to material that's already cracked or lifting.
- Product instructions: Sealant and coating products vary in cure time, recoat windows, and compatibility with different roof materials. Always follow the manufacturer's specific instructions for surface preparation and application rather than a one-size-fits-all approach.
Choosing a Sealant
RV roofs are made from different materials — rubber membrane, fiberglass, and metal being common examples — and not every sealant is compatible with every material. Check that any product you use is rated for your specific roof type before applying it. A primer is often needed on certain membrane roofs to help the topcoat bond properly; skipping this step can shorten the life of the whole job significantly.
In general, a good RV roof sealant should resist UV breakdown, remain flexible through temperature swings, and form a continuous, waterproof layer over seams and fasteners. Read product labels carefully rather than assuming any generic caulk or coating will perform the same way over years of sun exposure.
Preventing Costly Repairs
Consistent, simple habits go a long way toward avoiding major roof repairs:
- Inspect twice a year and after severe weather
- Reseal problem spots as soon as you find them
- Keep the roof clean of debris, which can trap moisture against the surface
- Cover or shade the RV when possible to reduce long-term UV exposure
A roof that's well maintained rarely fails suddenly. Most leaks develop slowly, giving an attentive owner plenty of opportunity to catch and fix small issues before they turn into structural damage.