Are you ready to take your camping experience to the next level? Imagine enjoying the beauty of nature while indulging in the comforts of a luxurious tent. But here’s the question: Is it possible to create your own glamping tent without breaking the bank?
Well, the answer is yes! In this article, I will guide you through the process of making your very own glamping tent. From planning and gathering materials to constructing the framework and adding luxurious touches, I’ve got you covered every step of the way. Get ready to transform your camping adventures into an unforgettable glamping experience!
Key Takeaways:
- Learn how to make a glamping tent on your own
- Discover step-by-step instructions for constructing the tent framework
- Find ideas for adding luxurious flooring, bedding, and decor to enhance your glamping experience
- Explore essential amenities to include in your glamping tent for ultimate comfort
- Get ready to embark on memorable outdoor adventures in your homemade glamping tent
Before you embark on building your own glamping tent, it’s crucial to plan out the construction and design. This step is essential to ensure that your glamping tent is not only beautiful but also functional. In this section, I’ll provide you with tips and ideas to help you create the perfect glamping tent that meets all your needs.
Determining Your Needs and Preferences
When planning your glamping tent, it’s important to first consider your individual needs and preferences. Think about the number of people who will be using the tent, the space required for essential amenities, and any specific design elements you desire.
Pro Tip: Take inspiration from existing glamping sites and luxury resorts to gather ideas for your tent’s design. Pay attention to unique features and consider how you can incorporate them into your own project.
Choosing the Right Location
Selecting the right location for your glamping tent is key to creating a pleasant and immersive experience. Consider factors such as natural surroundings, accessibility to amenities, and the overall ambiance you wish to achieve.
Pro Tip: If possible, choose a location that offers beautiful views and proximity to natural attractions. This will enhance the overall glamping experience for you and your guests.
Designing a Functional Layout
Having a well-thought-out layout ensures that your glamping tent is practical and easy to navigate. Consider the placement of furniture, amenities, and storage solutions to maximize space and create a comfortable living area.
Pro Tip: Create a sketch or use online tools to visualize and plan your tent’s layout. This will help you make informed decisions and avoid unnecessary adjustments during the construction phase.
Considering Sustainable and Eco-friendly Options
Incorporating sustainable and eco-friendly elements into your glamping tent design not only benefits the environment but also adds a unique touch to your experience. Explore options such as using renewable materials, implementing energy-efficient solutions, and minimizing waste.
Seeking Expert Advice
If you’re uncertain about certain aspects of glamping tent construction or design, don’t hesitate to reach out to experts in the field. They can provide valuable guidance and help you make informed decisions based on their experience.
By carefully planning your glamping tent, you’ll set the foundation for a truly remarkable outdoor retreat. Now that you have ideas in mind, let’s move on to gathering the materials and tools you’ll need for your DIY glamping adventure.
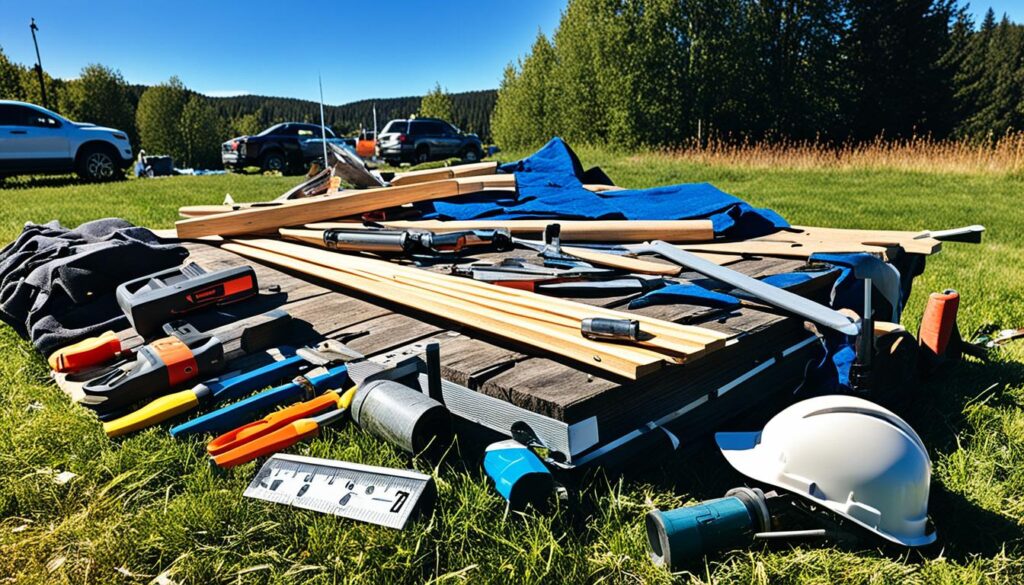
Gathering Materials and Tools
Now that you’re ready to embark on your glamping tent DIY journey, it’s time to gather all the materials and tools you’ll need. Don’t worry; it’s easier than it sounds! Here’s a comprehensive list to help you get started:
Materials
- Canvas or durable fabric
- Sturdy poles or PVC pipes
- Heavy-duty rope or bungee cords
- Groundsheet or tarp
- Waterproof sealant or spray
- Quality zippers or fasteners
- Insulation or padding (optional)
These materials will ensure that your glamping tent is not only aesthetically pleasing but also durable and weather-resistant.
Tools
- Measuring tape
- Scissors or utility knife
- Sewing machine or heavy-duty needle and thread
- Hammer or mallet
- Saw or pipe cutter (if using PVC pipes)
- Staple gun or eyelet punch
- Paintbrush or roller (for waterproofing)
These tools will assist you in the construction process and ensure that your glamping tent comes together seamlessly.
Pro Tip: Remember to check local building codes and regulations before starting your glamping tent project. Some areas may have specific guidelines regarding temporary structures or land use.
Now that you have a clear understanding of the materials and tools required, it’s time to move on to the next step: constructing the tent framework.
| Materials | Tools |
|---|---|
| Canvas or durable fabric | Measuring tape |
| Sturdy poles or PVC pipes | Scissors or utility knife |
| Heavy-duty rope or bungee cords | Sewing machine or heavy-duty needle and thread |
| Groundsheet or tarp | Hammer or mallet |
| Waterproof sealant or spray | Saw or pipe cutter (if using PVC pipes) |
| Quality zippers or fasteners | Staple gun or eyelet punch |
| Insulation or padding (optional) | Paintbrush or roller (for waterproofing) |
With these materials and tools in hand, you’re well-equipped to bring your homemade glamping tent to life. So roll up your sleeves, get ready to unleash your creativity, and let’s dive into the next section: Constructing the Tent Framework.
Constructing the Tent Framework
Building the framework is an essential step in creating your glamping tent. It provides the structure and stability needed for your ultimate outdoor retreat. Follow my step-by-step guide below to construct the tent framework and ensure a successful glamping experience.
Gather the Necessary Materials
Before you begin, make sure you have all the materials required for constructing the tent framework. Here’s a list of what you’ll need:
- Wooden poles: Choose sturdy and durable poles that can withstand various weather conditions.
- Hammer: A hammer will be necessary for securing the poles together.
- Rope or cord: Use strong rope or cord to tie the poles together and provide additional support.
- Tarp or canvas: This will serve as the main covering for your glamping tent.
Step-by-Step Instructions
- Start by selecting a suitable location for your glamping tent. Clear the area and ensure it is free from any debris or rocks that could affect the stability of your structure.
- Measure and mark the desired dimensions for your tent. This will depend on the size of your tarp or canvas.
- Begin assembling the framework by positioning the wooden poles at each corner of the marked area. Ensure they are firmly planted in the ground to provide stability.
- Use the hammer to secure the poles together at the top, forming a pyramid-like structure.
- Once the poles are securely connected, reinforce the structure by tying rope or cord around the joints. This will provide additional support and prevent the framework from collapsing.
- Drape the tarp or canvas over the framework, ensuring it covers the entire structure. Use clips or ropes to secure it in place.
- Adjust the tension of the tarp or canvas to create a taught and wrinkle-free covering. This will not only enhance the aesthetics of your glamping tent but also improve its durability.
With the completion of the tent framework, you’re now ready to move on to the next steps of customizing your glamping tent. Remember to take your time and follow the instructions carefully for a successful construction process. Happy glamping!
| Pros of Constructing the Tent Framework | Cons of Constructing the Tent Framework |
|---|---|
| – Provides stability and structure for the glamping tent | – Requires time and effort to assemble |
| – Allows for customization and personalization of the tent | – May require additional assistance for larger frameworks |
| – Ensures a sturdy base for the tent, even in windy conditions | – May incur additional costs for purchasing materials |
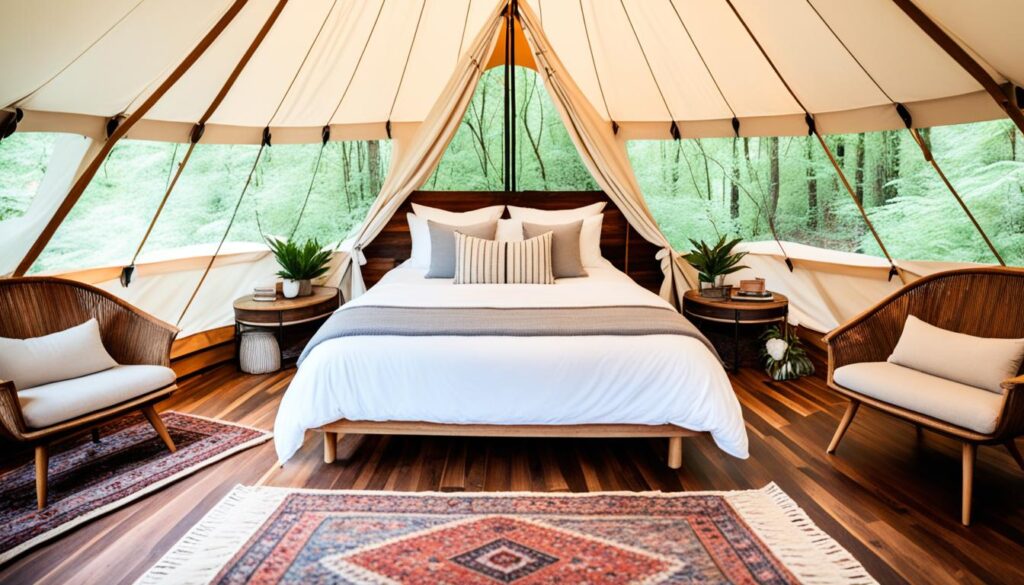
Adding Luxurious Flooring and Bedding
To achieve the true glamping experience, you’ll want to create a comfortable and inviting space inside your tent. As they say, “Home is where the heart is,” and your glamping tent should reflect that cozy feeling. In this section, I’ll share tips on choosing the right flooring and bedding to enhance your glamping adventure and make you feel right at home in the great outdoors.
Choosing the Perfect Flooring
When it comes to glamping tent design, the flooring can make a significant difference in both style and comfort. You want a surface that not only looks luxurious but is also practical for camping. Here are a few flooring options worth considering:
- Soft Carpets: Opt for plush carpets or rugs that provide a cozy and warm feel under your feet.
- Outdoor Mats: Durable and easy to clean, outdoor mats are perfect for adding a touch of elegance to your glamping tent.
- Wooden Decking: If you’re looking for a more permanent flooring solution, consider building a wooden deck inside your tent. It adds a rustic charm while ensuring stability.
Creating a Dreamy Bedding Setup
Now, let’s focus on the most important spot in your glamping tent – the bed. After all, a good night’s sleep is key to enjoying your outdoor adventures to the fullest. Here are some tips for creating the perfect glamping bed:
- Luxurious Bedding: Invest in high-quality bedding, including soft sheets, fluffy pillows, and a cozy duvet or comforter. Choose fabrics that offer maximum comfort and appeal to your personal style.
- Canopy or Mosquito Net: Add a touch of romance to your glamping tent by incorporating a canopy or mosquito net around your bed. Not only does it create an enchanting ambiance, but it also provides protection from unwanted insects.
- Pillows and Throws: Scatter decorative pillows and throws to enhance the inviting atmosphere of your glamping bed. Mix and match colors and textures to add a personal touch.
By choosing the right flooring and creating a dreamy bedding setup, you’ll transform your glamping tent into a luxurious oasis. Now, let’s dive deeper into enhancing your glamping tent with decor in the next section. Get ready to personalize your outdoor retreat!
Enhancing Your Glamping Tent with Decor
Transform your glamping tent into a stylish and cozy retreat by adding the right decor. Personal touches and a unique ambiance can make your outdoor experience even more memorable. Here are some ideas and suggestions to inspire your glamping tent design:
Create a Nature-Inspired Theme
Bring the beauty of the outdoors inside your tent with a nature-inspired theme. Use earthy tones, floral patterns, and natural materials such as wooden accents and woven decor. Incorporate elements like potted plants, leaf-shaped pillows, and botanical artwork to create a serene and calming atmosphere.
Add Cozy Textiles and Lighting
Add warmth and comfort to your glamping tent with cozy textiles and soft lighting. Layer rugs and blankets in plush fabrics like faux fur or knitted materials. Use string lights, lanterns, and candleholders to create a warm and inviting glow. This combination of textures and lighting will make your tent feel like a cozy retreat.
Showcase Vintage Charm
If you love the charm of vintage decor, incorporate it into your glamping tent design. Look for antique-inspired furniture, vintage suitcases as storage, and retro-patterned textiles. Mix and match different eras for an eclectic feel that adds personality and character to your space.
Get Creative with Storage Solutions
In a compact glamping tent, clever storage solutions can make a big difference in maximizing space and keeping everything organized. Opt for multi-functional furniture with built-in storage compartments. Use hanging organizers, collapsible crates, and stackable bins to keep your belongings neatly tucked away.
Personalize with Photos and Art
Add a personal touch to your glamping tent by displaying photos and artwork that bring you joy. Hang framed pictures of your favorite outdoor adventures or use a travel map to mark the places you’ve explored. This personalized decor will make your tent feel like a true reflection of your experiences and memories.
Accessorize with Cushions and Throws
Create a cozy seating area inside your glamping tent by adding plenty of cushions and throws. Choose cushions in different sizes, shapes, and colors to create visual interest. Mix and match patterns and textures for a stylish and inviting seating nook.
Bring the Indoors Out
Extend the comfort and style of your glamping tent to the outdoor area as well. Create an outdoor lounge with weather-resistant furniture, cozy blankets, and throw pillows. Hang outdoor curtains for added privacy and shade. By blurring the lines between indoor and outdoor spaces, you can enjoy the best of both worlds.
Set the Mood with Scented Candles
Enhance the atmosphere of your glamping tent with the flickering glow and inviting scents of scented candles. Choose scents that evoke nature, such as lavender, pine, or citrus. Not only will they add a pleasant fragrance, but they will also create a calming and relaxing ambiance.
By incorporating these decor tips and ideas into your glamping tent, you can create a space that is both visually appealing and comfortable. Let your personal style and preferences guide you as you design a glamping experience that is uniquely yours.
Setting Up Essential Amenities
When it comes to glamping, creating a cozy and comfortable space is key. To truly elevate your glamping tent experience, it’s essential to include the right amenities. From lighting to seating and storage solutions, I’ve got you covered with these expert glamping tent tips.
1. Ambient Lighting
One of the most important aspects of setting up your glamping tent is creating the perfect ambiance with lighting. Opt for LED string lights or lanterns to provide soft, warm illumination during the evenings. You can hang them from the tent’s ceiling or attach them to nearby trees for a magical touch.
2. Comfy Seating Options
Make your glamping tent a cozy retreat by incorporating comfortable seating options. Consider adding a couple of plush armchairs or bean bags where you can relax and unwind after a long day of outdoor adventures. Don’t forget to include cushions and blankets to enhance the comfort factor.
3. Smart Storage Solutions
Keep your glamping tent organized and clutter-free with smart storage solutions. Invest in collapsible storage bins or hanging organizers to store your clothes, toiletries, and other essentials. This will help maximize space and ensure everything has its place, keeping your glamping tent tidy and functional.
Tip: Use multifunctional furniture, like ottomans with hidden storage, to optimize both seating and storage in your glamping tent.
4. Creature Comforts
Don’t forget to include additional creature comforts to make your glamping tent feel like a home away from home. Consider bringing along a portable fan or heater, depending on the weather conditions. You can also add a mini-fridge or cooler to keep your drinks and snacks fresh. These small additions can make a big difference in enhancing your overall glamping experience.
5. Outdoor Rug
Add a touch of luxury underfoot by placing an outdoor rug inside your glamping tent. This not only adds visual appeal but also provides insulation from the ground and keeps your feet cozy. Choose a rug that complements your overall tent decor and is easy to clean in case of any outdoor mess.
By incorporating these essential amenities into your glamping tent, you’ll create a space that combines the comforts of home with the beauty of nature. Get ready to immerse yourself in a truly luxurious camping experience.
Conclusion
Now that you’ve completed your glamping tent, you’re ready to embark on incredible outdoor adventures in style and comfort. Throughout this tutorial, we’ve covered all the steps necessary to create your own luxurious camping haven.
First, we began by planning your glamping tent, considering the construction and design aspects. Then, we gathered the necessary materials and tools to bring your vision to life. Once prepared, we constructed the tent framework, ensuring a sturdy structure to support your glamping experience.
Next, we focused on adding luxurious flooring and bedding, creating a comfortable space that rivals any high-end hotel suite. We also explored various decorating options to add a personal touch and create a cozy ambiance within your glamping tent.
Finally, we discussed essential amenities that elevate your camping experience, such as lighting, seating, and storage solutions. By incorporating these elements, you can enjoy all the comforts of home while immersing yourself in the beauty of nature.
With your glamping tent complete, get ready to enjoy countless unforgettable moments in the great outdoors. Whether it’s a weekend getaway or a longer expedition, your homemade glamping tent will be a true testament to your creativity and resourcefulness.
FAQ
How long does it take to make a glamping tent?
The time it takes to make a glamping tent depends on your skill level and the complexity of the design. It can range from a few hours to a few days.
What materials do I need to make a glamping tent?
The materials you’ll need for a glamping tent include a sturdy frame, canvas or waterproof fabric, insulation, flooring materials, bedding, and various decor items.
Can I customize the design of my glamping tent?
Absolutely! One of the great things about making your own glamping tent is that you can personalize the design to suit your preferences. The possibilities are endless!
Where can I find the necessary materials and tools?
You can find most of the materials and tools needed for a glamping tent at your local hardware or camping supply store. Alternatively, you can also find them online from various retailers.
Do I need any special skills to make a glamping tent?
While some basic DIY skills are helpful, you don’t need to be an expert to make a glamping tent. As long as you can handle basic tools and follow instructions, you’ll be able to create your own luxurious camping retreat.
How much does it cost to make a glamping tent?
The cost of making a glamping tent can vary depending on the materials and decor items you choose. On average, you can expect to spend a few hundred dollars, but it can be more or less depending on your budget and preferences.
Can I dismantle and reassemble my glamping tent?
Yes, you can dismantle and reassemble your glamping tent if you need to move or store it. However, it’s important to carefully follow the instructions to avoid damaging the structure or fabric.
How can I make my glamping tent more durable?
To make your glamping tent more durable, consider using high-quality materials, reinforcing crucial areas, and properly maintaining it. Regular inspections and repairs, as needed, will help extend its lifespan.
Are there any safety considerations when making a glamping tent?
Safety should always be a top priority when making a glamping tent. Make sure to follow safety guidelines when using tools, choose fire-resistant materials, and properly secure the structure to prevent accidents.
Can I use my glamping tent in all seasons?
Depending on the insulation and climate control measures you implement, you may be able to use your glamping tent in various seasons. However, extreme weather conditions may require additional precautions.