Welcome to my comprehensive guide on mastering the art of brewing coffee while camping using a percolator. Whether you’re a seasoned camper or new to the outdoor adventure, a percolator is a classic and reliable brewing method that can deliver rich and hearty coffee in the wilderness.
In this guide, I’ll walk you through everything you need to know about camping percolators, from selecting the best one for your needs to brewing delicious coffee and keeping your percolator clean. So, let’s dive in and discover the secrets of using a percolator to brew the perfect cup of coffee in the great outdoors!
Key Takeaways:
- Master the art of brewing coffee while camping using a percolator
- Select the best camping percolator based on factors like durability and heat distribution
- Follow simple steps to make delicious coffee with your camping percolator
- Clean your percolator effectively to ensure the best-tasting coffee on future trips
- Consider alternative brewing methods for a unique coffee experience while camping
Selecting the Best Coffee Percolator for Camping
When it comes to enjoying a delicious cup of coffee while camping, a reliable and functional percolator is essential. Selecting the right camping percolator requires consideration of various factors, including durability, heat distribution, and ease of use. By choosing the right percolator, you can ensure that your camping coffee experience is nothing short of exceptional.
There are different types of camping percolators available in the market, each with its own advantages and considerations. Here are a few popular options:
- Enamelware Percolators: These percolators have a nostalgic charm and are visually appealing. However, they are prone to staining and chipping, which may affect their longevity.
- Aluminum Percolators: Aluminum percolators are lightweight and budget-friendly. They are a popular choice among campers. However, they may not be as durable as stainless steel options.
- Stainless Steel Percolators: Stainless steel percolators are known for their durability and ability to distribute heat evenly. They are robust and can withstand the ruggedness of camping trips.
When selecting a percolator, consider the size and capacity that suit your camping group’s needs. Additionally, look for percolators that have easy-to-use features, such as a clear lid or sight glass that allows you to monitor the brewing process.
Here is a comparison table highlighting the key features of different camping percolators:
| Percolator Type | Durability | Heat Distribution | Ease of Use |
|---|---|---|---|
| Enamelware | Prone to staining and chipping | Varies | May require extra care |
| Aluminum | Less durable | Varies | Lightweight and easy to handle |
| Stainless Steel | Durable | Even heat distribution | Simple and reliable |
Choose a percolator that aligns with your camping style and brewing preferences. Remember that investing in a high-quality percolator will enhance your camping coffee experience and ensure that you can enjoy a delicious cup of joe even in the great outdoors.
Image source: https://seowriting.ai/32_6.png
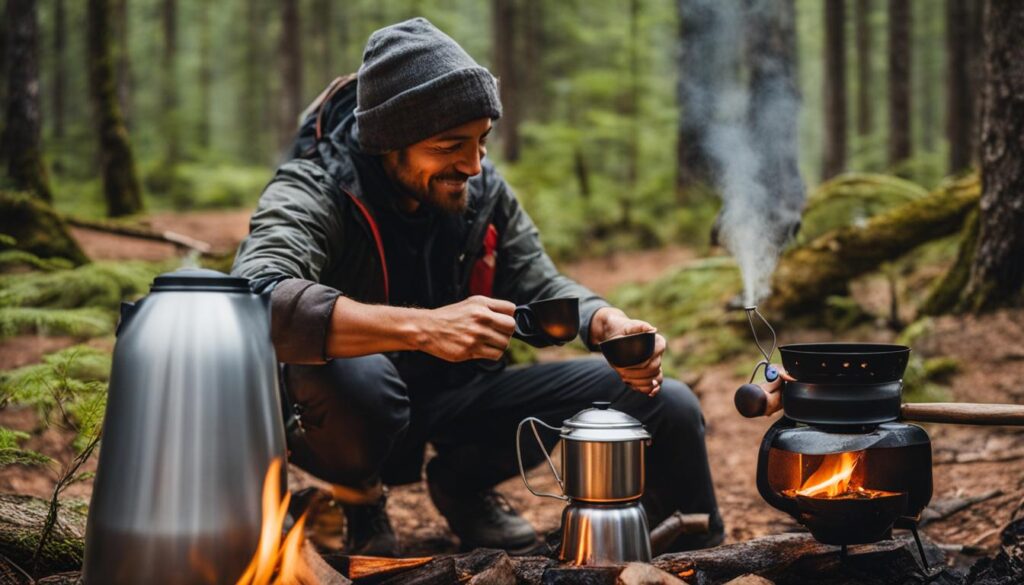
How to Use a Camping Percolator to Make Delicious Camping Coffee
Brewing coffee with a camping percolator is a straightforward process. To ensure a perfect cup of coffee, follow these simple steps:
- Gather your supplies: You’ll need a camping percolator, coarse ground coffee, a camping coffee mug, and a heat source.
- Prepare the percolator: Fill the percolator with cold water. Reinsert the percolator apparatus, ensuring it fits snugly. To improve the taste of your coffee, you can optionally use a disc filter in the grounds basket.
- Add the coffee grounds: Measure the desired amount of coarse ground coffee and add it to the grounds basket.
- Align the siphon stem: Find the siphon stem in the percolator. Align it with the sight-glass, ensuring a proper flow of coffee.
- Apply medium heat: Place the percolator on a heat source, such as a camping stove or open fire. Avoid boiling the coffee, as it can result in a bitter taste. Instead, use medium heat to keep the brewing process steady and controlled.
- Brew the coffee: Allow the coffee to percolate for about 10 minutes. Keep an eye on the sight-glass to monitor the brewing process.
- Remove the percolator apparatus: Carefully remove the percolator apparatus from the percolator once the brewing is done.
- Let the coffee settle: Allow the coffee to settle for a few minutes, allowing the flavors to meld together.
- Pour and enjoy: Pour the freshly brewed coffee into your camping coffee mug and savor the rich aroma and taste of your camping coffee creation.
With these simple steps, you can start your day with a delicious cup of coffee brewed using a camping percolator.
How to Clean Your Camping Percolator
Cleaning a camping percolator is an essential part of maintaining its performance and ensuring the best-tasting coffee on future camping trips. Follow these simple steps to keep your percolator in top shape:
- Begin by disposing of the used coffee grounds and any disc filter, if used. Empty out any remaining water from the percolator.
- Next, carefully disassemble the percolator apparatus. Remove the basket, the percolator tube, and any other removable parts.

- Using mild biodegradable camping dish soap, wash all the percolator parts thoroughly. Pay close attention to the basket, tube, and the inside of the percolator itself. Scrub gently to remove any coffee residue or stains.
- Rinse all the parts with clean water until no soap residue remains.
- Allow the percolator and its components to fully air dry. Placing them in direct sunlight can help speed up the drying process.
- Once completely dry, reassemble the percolator. Make sure all parts are securely in place.
- Store the percolator in a cool, dry place until your next camping adventure.

Cleaning your camping percolator after each use not only helps maintain its longevity but also preserves the quality and taste of your coffee. Remember to handle the percolator and its parts with care to avoid any damage.
Tips for Brewing Great Coffee with a Camping Percolator
When it comes to brewing coffee with a camping percolator, there are a few tips and tricks that can help you make the best cup of coffee while enjoying the great outdoors.
1. Choose High-Quality Whole Bean Coffee
To ensure a flavorful and satisfying brew, start with high-quality whole bean coffee. Look for beans that are freshly roasted and sourced from reputable coffee roasters. Grinding the beans shortly before brewing will help release the full aroma and flavor of the coffee.
2. Avoid Boiling the Coffee
Boiling the coffee in a percolator can result in a bitter taste. Instead, use medium heat to brew your coffee. This gentle heat will ensure a smooth and balanced cup of coffee without any harsh flavors.
3. Follow the Recommended Brew Time
Most camping percolators come with recommended brew times. It’s important to adhere to these guidelines to extract the optimal flavors from your coffee beans. Brew times typically range from 8 to 10 minutes, but make sure to check the instructions specific to your percolator.
4. Experiment with Coffee-to-Water Ratio
The coffee-to-water ratio can greatly affect the strength and flavor of your coffee. Start with a ratio of 1 tablespoon of coffee per 6 ounces of water and adjust from there based on your personal taste preferences. Remember that the strength of the coffee can also be influenced by factors such as grind size and brewing time.
5. Add Flavorings to Enhance the Taste
To add a unique twist to your camping coffee, consider incorporating flavorings like cinnamon or vanilla. These spices can enhance the taste profile of your coffee and provide a delightful aroma while you sip.

Now that you are armed with these tips, you can brew a delicious cup of coffee with your camping percolator. Enjoy your coffee in the serene and picturesque setting of your campsite, immersing yourself in the beauty of nature while savoring the rich flavors of your brew.
Alternative Methods for Brewing Coffee While Camping
While camping percolators are a popular choice for coffee brewing while camping, there are other methods to consider. Some campers prefer using a camping espresso maker or a pour-over coffee setup. These alternative methods offer different brewing techniques and can provide a unique coffee experience in the great outdoors. Explore these options to find the brewing method that suits your taste and camping style.
1. Camping Espresso Maker
If you’re a fan of rich and strong espresso, a camping espresso maker is a fantastic option. These portable and compact devices allow you to enjoy a delicious shot of espresso right at your campsite. Simply add water and your favorite coffee grounds, apply heat, and let the machine work its magic. With a camping espresso maker, you can savor the bold flavors and aromas of espresso during your outdoor adventures.
2. Pour-Over Coffee Setup
For those who enjoy a more hands-on brewing process, a pour-over coffee setup is a great choice. All you need is a pour-over dripper, coffee filters, hot water, and your preferred coffee grounds. Place the dripper over your coffee mug or carafe, insert a filter, add coffee grounds, and slowly pour hot water over the grounds in a circular motion. This method allows you to control the brewing time and intensity, resulting in a customized and flavorful cup of coffee.
3. French Press
A classic French press is another popular option for brewing coffee while camping. With its simple design, this brewing method allows for full immersion and extraction of the coffee grounds, resulting in a full-bodied and robust cup of coffee. Add coarse coffee grounds and hot water to the French press, let it steep for a few minutes, and then press down the plunger to separate the grounds from the brewed coffee. The French press is portable, easy to use, and delivers rich and flavorful coffee.
“Exploring alternative methods for brewing coffee while camping can add excitement and variety to your outdoor experience.”
By trying different brewing methods, you can discover new flavors and perfect your coffee brewing skills while enjoying the beauty of nature. Whether you choose a camping percolator, a camping espresso maker, a pour-over setup, or a French press, the key is to experiment and find the method that suits your preferences and enhances your camping adventures. Happy brewing!

The Importance of Coffee in Camping and Outdoor Activities
Coffee plays a vital role in camping and outdoor activities. It provides a comforting and energizing start to the day, enhances the camping experience, and brings people together around the campfire. Brewing coffee with a camping percolator adds a nostalgic touch to the camping routine and creates lasting memories. Whether you’re hiking, fishing, or simply enjoying the beauty of nature, a cup of freshly brewed coffee can make the experience even more enjoyable.
Conclusion
Using a camping coffee percolator is the perfect solution for brewing a delicious cup of joe while enjoying the great outdoors. By following the percolator camping tips provided in this guide, you can easily master the art of brewing coffee in the wilderness. Selecting the right camping percolator for your specific needs is crucial, considering factors such as durability, heat distribution, and ease of use.
Once you have your camping percolator, it’s time to experiment with different coffee varieties, ratios, and brewing times to find the perfect combination that suits your taste buds. Whether you prefer a bold and strong brew or a more subtly flavored cup, the camping coffee percolator allows you to customize your camping coffee experience.
So next time you embark on an outdoor adventure, don’t forget to pack your camping coffee percolator and essential coffee supplies. Waking up to the soothing aroma of freshly brewed coffee amidst the beauty of nature is an experience that every coffee lover should savor. Soak in the serenity of your campsite while indulging in a steaming cup of coffee brewed with your trusty camping percolator.
FAQ
How do I select the best coffee percolator for camping?
When choosing a camping percolator, consider factors such as durability, heat distribution, and ease of use. Enamelware, aluminum, and stainless steel percolators each have their own advantages and considerations. Select the percolator that best suits your camping needs.
What is the process for using a camping percolator to make coffee?
To use a camping percolator, fill it with cold water, insert the percolator apparatus, and optionally use a disc filter in the grounds basket. Add coarse ground coffee, align the siphon stem with the sight-glass, and apply medium heat. Brew for about 10 minutes, then carefully remove the percolator apparatus. Allow the coffee to settle before pouring and enjoying.
How do I clean a camping percolator?
Start by disposing of used coffee grounds and any disc filter. Disassemble the percolator apparatus and wash all the parts with mild biodegradable camping dish soap. Allow the percolator to fully air dry before reassembling and storing for future use.
What are some tips for brewing great coffee with a camping percolator?
Use high-quality whole bean coffee and grind it shortly before brewing. Avoid boiling the coffee by using medium heat and following the recommended brew time. Experiment with the coffee-to-water ratio to find your preferred strength. Consider adding flavorings to enhance the taste.
Are there alternative methods for brewing coffee while camping?
Yes, some campers prefer using a camping espresso maker or a pour-over coffee setup. These alternative methods offer different brewing techniques and can provide a unique coffee experience in the great outdoors.
What is the importance of coffee in camping and outdoor activities?
Coffee provides a comforting and energizing start to the day, enhances the camping experience, and brings people together around the campfire. Brewing coffee with a camping percolator adds a nostalgic touch to the camping routine and creates lasting memories.