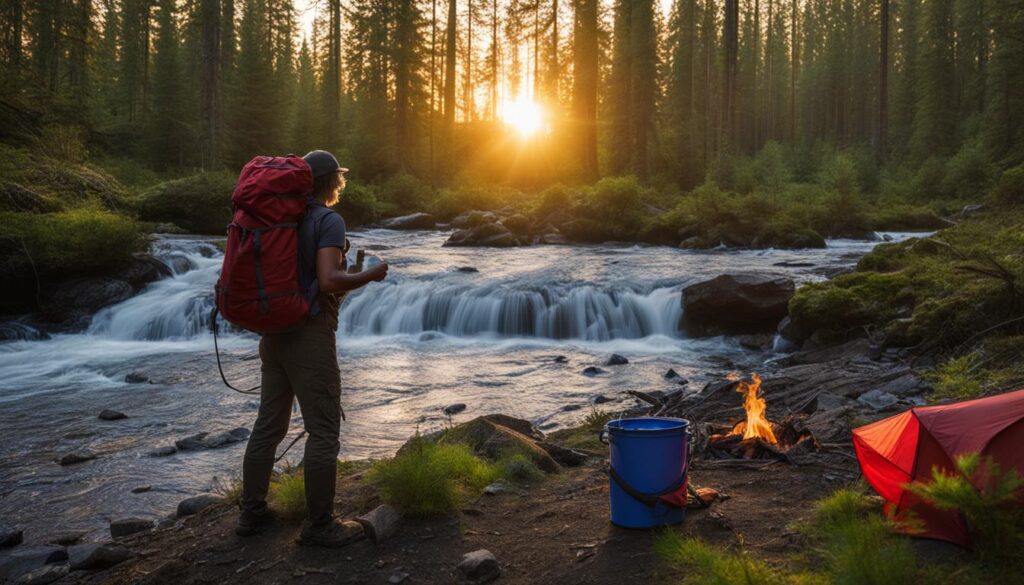
When camping or backpacking, it’s sometimes nice to have a shower. However, most camp showers on the market are expensive or made of cheap materials. To save money, you can make your own camping shower using simple materials and various DIY methods. In this guide, I’ll provide step-by-step instructions on how to make different types of camping showers, from handheld and gravity-fed showers to more complex pressurized showers.
Key Takeaways:
- Learn how to make your own camping shower using simple materials
- Explore various DIY methods, from handheld to pressurized showers
- Save money by creating a customized camping shower
- Enjoy a refreshing shower experience while camping or backpacking
- Follow step-by-step instructions to create different types of camping showers
Contents
Handheld Camping Shower
When it comes to camping showers, a handheld option provides convenience and portability. With a few simple materials, you can create your own handheld camping shower that is perfect for staying clean and refreshed during your outdoor adventures.
To make a handheld camping shower, start by finding a large, sturdy container with a lid. This can be a plastic or metal container that is able to hold water securely. Next, drill several small holes in the lid to create a shower head. Alternatively, you can use a sports cap lid that allows for adjustable flow. This will give you control over the water pressure while using the shower.
It’s important to add a vent to the container to prevent pressure build-up. This can be a small hole near the top of the container or a one-way valve. The vent will allow air to escape as water is released, ensuring a smooth flow of water during your shower.
Once you have assembled your handheld camping shower, simply fill the container with water and screw on the lid tightly. You can then use the shower by turning the container upside down and allowing the water to flow through the shower head. Adjust the flow by opening or closing the sports cap lid.
A handheld camping shower is a great option for those who want a quick and easy bathing solution while camping. It’s lightweight, portable, and can be made using materials you might already have on hand. With a handheld camping shower, you can enjoy the convenience of a refreshing shower even when you’re far away from traditional plumbing.

Stay tuned for the next section where we’ll explore another DIY camping shower option: the gravity-fed camp shower.
Gravity Fed Camp Shower
When it comes to DIY camp showers, a gravity-fed system is an excellent option. This setup allows you to enjoy a refreshing shower without the need for electricity or complicated plumbing.
To create a gravity-fed camp shower, you’ll need a portable water storage tank with a spigot and adjustable flow. Aim for a tank size of around 2 gallons to ensure optimal water pressure. One popular choice for the shower head is a garden watering can head, which can be easily attached to the spigot.
To use the gravity-fed shower, hang the tank using a rope handle or a sturdy hook. Make sure the tank is secure and at an appropriate height for comfortable showering. Then, remove the air vent plug to allow water flow. The gravity-powered water will begin to flow, providing you with a satisfying shower experience.
It’s important to note that the water will continue to flow for approximately 30 seconds once you re-plug the air vent. This allows you ample time to rinse off and clean up.
An advantage of a gravity-fed camp shower is its simplicity and portability. It can be easily packed and transported to your camping destination. Additionally, you have control over the water flow, allowing you to adjust it according to your preferences.
Benefits of a Gravity Fed Camp Shower:
- Economical and environmentally friendly
- No need for electricity or plumbing
- Easy to use and portable
- Adjustable water flow
If you’re looking for a convenient and cost-effective way to enjoy a refreshing shower while camping, a gravity-fed camp shower is the perfect solution. With its simple setup and portable design, you can experience the comfort of a shower in the great outdoors.
Gravity Fed Camp Shower Components:
| Components | Description |
|---|---|
| Portable water storage tank | Around 2 gallons in size, with a spigot and adjustable flow |
| Garden watering can head | Attached to the spigot for the shower head |
| Rope or sturdy hook | To hang the tank at an appropriate height |
With a gravity-fed camp shower, you can enjoy the convenience of a shower system wherever your camping adventures take you. Set up this DIY solution and experience the refreshing benefits of a gravity-fed shower.

Dry Bag Camp Shower
When it comes to camping showers, space-saving and portability are important factors to consider. That’s why a dry bag camp shower is a fantastic option for outdoor enthusiasts. This DIY solution allows you to transform a simple dry bag into a functional and portable camping shower. Here’s how you can make your own:
Materials:
- A sturdy dry bag
- A plastic bottle with screw threads
- An O-ring
- Epoxy glue
Instructions:
- Start by cutting off the screw threads from a plastic bottle. This will serve as the shower head.
- Make several holes in one bottle cap to allow water to flow through.
- Glue an O-ring inside the cap to create a tight seal.
- Next, cut a small hole in the dry bag, large enough to fit the screw threads through.
- Insert the screw threads through the hole in the dry bag.
- Secure the screw threads in place with epoxy, ensuring a watertight seal.
- Fill the dry bag with water, making sure to close the top securely.
- Let the bag heat in the sun until the water reaches your desired temperature.
- Finally, hang the dry bag on its side using a tree branch or any other suitable hanging point. The water will flow out of the shower head, providing you with a refreshing and portable camping shower experience.
This same shower bag can also serve as a pump for inflating camping mattresses. Simply attach it to the mattress valve and use the bag’s water pressure to inflate the mattress quickly and effortlessly.

| Advantages of a Dry Bag Camp Shower | Disadvantages of a Dry Bag Camp Shower |
|---|---|
| 1. Portability – easy to carry and transport. | 1. Limited water capacity compared to other camping shower options. |
| 2. Space-saving – takes up minimal storage space. | 2. Requires access to a water source for refilling. |
| 3. Versatility – can be used as a shower or as a pump for camping mattresses. | 3. May not provide the same water pressure as pressurized camp showers. |
Garden Sprayer Pressurized Camp Shower
Looking for an easy and affordable way to create a pressurized camp shower? Repurposing a garden sprayer might be the perfect solution! With a few simple steps, you can transform a common household item into a practical and efficient camping shower.
To get started, gather the following materials:
- A garden sprayer
- A small plastic bottle
- Electrical tape
- A wine cork
Here’s a step-by-step guide on how to create a garden sprayer pressurized camp shower:
- Cut a small plastic bottle, separating the bottom and top parts.
- Insert the bottom part into the top part, ensuring a secure fit, and use electrical tape to hold them together.
- Poke holes in the bottom part of the bottle to create the showerhead.
- Cut a wine cork in half and make a groove in each side to fit the pressure sprayer end.
- Insert the pressure sprayer end into the cork and attach it to the bottle cap.
Once you’ve assembled your garden sprayer pressurized camp shower, you can use it with a garden hose nozzle for a proper shower experience. Simply connect the garden hose nozzle to the pressure sprayer end and adjust the water flow to your liking.
This DIY camping shower is a convenient and cost-effective alternative to commercially available options. It’s portable, easy to use, and provides a pressurized water stream for a refreshing shower while camping. Whether you’re exploring the great outdoors or taking a weekend getaway, the garden sprayer pressurized camp shower is a practical addition to your camping gear.
For a visual representation of the garden sprayer pressurized camp shower, take a look at the image below:
| Materials | Instructions |
|---|---|
| Garden sprayer | Cut a small plastic bottle, separating the bottom and top parts. |
| Small plastic bottle | Insert the bottom part into the top part, ensuring a secure fit, and use electrical tape to hold them together. |
| Electrical tape | Poke holes in the bottom part of the bottle to create the showerhead. |
| Wine cork | Cut a wine cork in half and make a groove in each side to fit the pressure sprayer end. |
Garden Sprayer with Garden Hose Nozzle
Looking for a convenient and pressurized outdoor shower option? Consider using a garden sprayer with a garden hose nozzle for your camping needs. This DIY setup allows you to enjoy a refreshing shower experience while camping in the great outdoors.
To create a garden sprayer with a garden hose nozzle, follow these simple steps:
- Start by removing the spraying wand from the garden sprayer.
- Next, attach a garden hose adapter to the nozzle of the sprayer.
- Insert the sprayer hose into the adapter.
- Secure the hose and adapter connection with a hose clamp.
Please note that depending on the water pressure in your area, you may need to change the hose to achieve optimal water flow and pressure.
The garden sprayer with a garden hose nozzle provides a reliable and pressurized outdoor camping shower. Whether you’re cooling off on a hot summer day or rinsing off after a long hike, this DIY setup is sure to enhance your camping experience.
Get ready to enjoy a refreshing and invigorating shower in nature with a garden sprayer and garden hose nozzle combo.
Roof Rack Camp Shower
Looking for a more advanced DIY project to enhance your camping experience? Consider creating a roof rack camp shower, similar to the Yakima RoadShower. This involves mounting a water container on the top of your car and pressurizing it with a bike pump. Although it requires more work and tools, the roof rack camp shower provides a convenient and pressurized shower experience while camping.
With a roof rack camp shower, you can enjoy the luxury of a refreshing shower no matter where your outdoor adventures take you. Whether you’re camping, hiking, or road tripping, having a reliable and easily accessible camping shower system can greatly enhance your comfort and hygiene. Say goodbye to dirty and uncomfortable camping showers and hello to the convenience of a roof rack camp shower!
To create your own roof rack camp shower, you can find detailed instructions online. These resources will guide you through the process of securely mounting a water container on your roof rack and connecting it to a bike pump for pressurization. With a little bit of DIY know-how and some patience, you’ll soon have your very own roof rack camp shower ready for your next outdoor adventure!
FAQ
How can I make a handheld camping shower?
To make a handheld camping shower, find a large, sturdy container with a lid and drill some holes in the lid to create a shower head. Alternatively, you can use a sports cap lid for adjustable flow. Don’t forget to add a vent to prevent pressure build-up in the container. This type of camping shower is easy to make and portable.
What is a gravity-fed camp shower?
A gravity-fed camp shower is a camping shower system that relies on the force of gravity to provide water flow. To create this system, you’ll need a portable water storage tank with a spigot and adjustable flow. Hang the tank with a rope handle and remove the air vent plug to turn on the water flow. Replace the air vent plug to stop the water flow. This type of camping shower is convenient and easy to set up.
How can I make a camp shower using a dry bag?
To make a camp shower using a dry bag, cut off the screw threads from a plastic bottle and create holes in a bottle cap to create a shower head. Glue an O-ring inside the cap for a tight seal. Cut a hole in the dry bag and insert the screw threads through it. Secure the screw threads in place with epoxy. Fill the bag with water, let it heat in the sun, and then hang it on its side to shower. This portable shower system can also be used as a pump for a camping mattress.
How can I create a garden sprayer pressurized camp shower?
To create a garden sprayer pressurized camp shower, cut a small plastic bottle and insert the bottom part into the top part, securing them with electrical tape. Poke holes in the bottom part for the shower head. Cut a wine cork in half and make a groove in each side to fit the pressure sprayer. Insert the pressure sprayer end into the cork and attach it to the bottle cap. You can then use this DIY shower with a garden hose nozzle for a proper shower experience.
How can I use a garden sprayer with a garden hose nozzle as a camping shower?
To use a garden sprayer with a garden hose nozzle as a camping shower, remove the spraying wand from the sprayer, attach a garden hose adapter to the nozzle, insert the sprayer hose into the adapter, and secure it with a hose clamp. If needed, you can change the hose to achieve optimal water pressure. This DIY shower system provides a pressurized shower experience in the outdoors.
What is a roof rack camp shower?
A roof rack camp shower is a camp shower system that involves mounting a water container on the top of your car and pressurizing it with a bike pump. While this option requires more work and tools, it provides a convenient and pressurized shower experience while camping. Instructions for creating your own roof rack camp shower can be found online.