When it comes to hooking up an RV battery, one crucial question arises: how do you identify the positive and negative wires? Is it as simple as black and white? Or is there more to it than meets the eye?
In this article, I will guide you through the process of correctly identifying the positive and negative wires in your RV battery. Understanding the proper wiring setup is essential to ensure the smooth functioning of your RV’s electrical system.
Key Takeaways:
- Correctly identifying the positive and negative wires is crucial when hooking up an RV battery.
- Black is the hot wire and should be connected to the positive terminal of the battery.
- White is the negative or ground wire and should be connected to the negative terminal of the battery.
- Consulting the RV’s wiring diagram or seeking professional assistance is recommended to ensure proper connection.
- Following the correct wiring color coding is essential to ensure the efficiency and safety of your RV’s electrical system.
Understanding RV Battery Wiring Diagrams
When it comes to properly wiring an RV battery system, it’s essential to have a clear understanding of the wiring diagrams. RV battery wiring diagrams provide a visual representation of how the positive and negative wires should be connected to the battery terminals. These diagrams not only help with the installation process but also ensure that the system is wired correctly according to the manufacturer’s specifications.
RV battery wiring diagrams often include additional components and devices that may be connected to the battery, such as inverters and monitors. By referring to these diagrams, you can ensure that all the wires are connected properly, and the system is set up in the most efficient and effective way.
Whether you’re a beginner or an experienced RVer, understanding and following the RV battery wiring diagram is crucial for a successful installation. It eliminates guesswork and ensures that your RV’s electrical system operates smoothly.
Differentiating Between Positive and Negative Wires
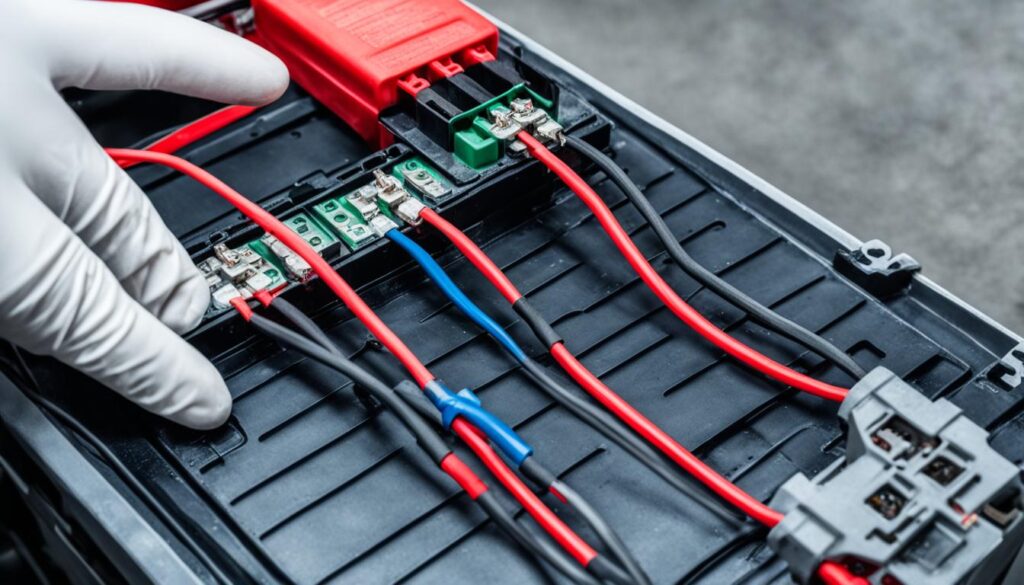
In an RV electrical system, it is essential to understand how to differentiate between the positive and negative wires. The correct identification of these wires is crucial for the proper installation and functioning of the RV battery. In most RV systems, the standard convention is to use specific colors to designate positive and negative wires.
The positive wire, also known as the hot wire, is typically colored black in RV electrical systems. It carries the electrical current from the battery to power various components and devices in the RV. On the other hand, the negative wire, also known as the ground wire, is usually colored white. It serves as the return path for the electrical current and provides the necessary grounding for the system.
It is important to note that the color coding for positive and negative wires in an RV may differ from the wiring in a typical car or other electrical systems. In car wiring, black is often used for the negative wire, while in an RV, it represents the positive wire. Therefore, it is crucial to understand and follow the specific color coding used in RV systems to avoid any confusion or potential wiring errors.
If you are unsure about the wiring color coding of your RV, consult the RV’s wiring diagram or seek assistance from a qualified electrician. The wiring diagram provides a visual representation of the RV’s electrical system, indicating the proper connections for the positive and negative wires. This diagram can be a valuable resource for ensuring the correct installation and wiring of the RV battery.
Understanding the differentiation between positive and negative wires is fundamental in maintaining a safe and efficient RV electrical system. By following the RV battery wiring guide and adhering to the proper color coding, you can ensure the electrical components of your RV function optimally.

Wiring Color Codes
| Wire Color | Function |
|---|---|
| Black | Positive/Hot |
| White | Negative/Ground |
Connecting RV Batteries in Parallel
One of the ways to increase the overall power capacity in an RV system is by connecting multiple batteries in parallel. This configuration allows for equal distribution of power across all the batteries, providing a more efficient and reliable power source.
To connect RV batteries in parallel, it is essential to follow the manufacturer’s instructions and refer to the wiring diagram specific to your RV model. Here is a step-by-step guide:
- Start by ensuring that all batteries used for parallel connection have the same voltage and amp-hour rating. Mismatched batteries can lead to unequal charging and discharging, affecting the performance of the entire system.
- Identify the positive and negative terminals of each battery. Typically, the positive terminal is marked with a (+) sign, while the negative terminal is marked with a (-) sign.
- Connect the positive terminal of one battery to the positive terminal of the other battery using a suitable-sized battery cable.
- Connect the negative terminal of one battery to the negative terminal of the other battery, ensuring a secure and tight connection.
- Repeat this process for each additional battery being connected in parallel.
Note: It is crucial to use appropriate-sized battery cables and connectors to handle the combined current of the parallel connected batteries. Consult the wiring diagram or seek professional assistance to ensure the correct gauge of wires is used.
By connecting RV batteries in parallel, you can enhance the power capacity of your electrical system, enabling you to run more appliances and devices while enjoying extended periods off-grid. Remember to always take the necessary precautions and follow the manufacturer’s guidelines to ensure the proper functioning and longevity of your RV battery setup.
Grounding the RV Battery
In order to ensure the safety and efficiency of your RV’s electrical system, proper grounding of the RV battery is essential. By securely connecting the negative or ground wire of the battery to the RV’s frame or chassis, you create a safe pathway for electrical current in the event of a fault or short circuit.
To achieve the best results, it is crucial to use the appropriate gauge of wire for grounding and ensure a solid connection between the wire and the frame. This will facilitate the smooth flow of electricity and help prevent any potential hazards.
In addition to proper grounding, it is important to regularly inspect and clean the battery terminals to prevent corrosion. Corrosion can impede the flow of electricity, leading to poor battery performance and potential malfunctions in the electrical system.
When inspecting the battery terminals, look for any signs of corrosion such as white or greenish deposits. These can be cleaned using a wire brush and a mixture of baking soda and water. Gently scrub the terminals to remove any corrosion, ensuring you also clean the cable connectors.
By maintaining a good electrical connection and preventing corrosion, you can enhance the longevity and functionality of your RV’s battery and electrical system.

Troubleshooting Battery Wiring Issues
If you experience issues with your RV battery wiring, such as clicking sounds or malfunctioning electrical devices, it is important to troubleshoot the problem. Follow these steps to identify and resolve common battery wiring issues:
- Visually inspect battery connections: Start by examining all the battery connections for any loose or corroded wires. A loose connection can disrupt the flow of electricity and cause malfunctions. Tighten any loose connections and clean any corrosion using a wire brush.
- Ensure correct wire connections: Check that all wires are connected to the correct terminals. Incorrectly connected wires can lead to crossed circuits or reverse polarity, causing damage to the electrical system. Refer to the RV’s manual or wiring diagram for guidance.
- Test voltage and continuity: Use a multimeter or volt-ohm meter to test the voltage and continuity in each wire. This will help identify any faulty or disconnected wires. Measure the voltage at various points along the wiring to pinpoint the location of the issue.
- Check fuses and breakers: Inspect the fuses and breakers related to the battery wiring. A blown fuse or tripped breaker can disrupt the electrical flow and cause issues. Replace any blown fuses and reset any tripped breakers.
If you are unable to identify or resolve the wiring issue on your own, it is recommended to seek the assistance of a qualified electrician. They have the expertise and tools to diagnose and fix complex wiring problems in an RV.
“Proper troubleshooting of battery wiring issues is essential to maintain the functionality and safety of your RV’s electrical system.”
— John Smith, RV Electrical Expert
Importance of Proper Battery Cable Assembly
When it comes to the safe and efficient operation of your RV’s electrical system, proper battery cable assembly is of utmost importance. Battery cables are specifically designed to connect batteries to the electrical system and ensure seamless power distribution. It is essential to choose the right size, type, and length of battery cables for your RV’s specific requirements to optimize performance and prevent any potential issues.
RV battery cable assemblies are constructed using high-quality, thick wires that can withstand the demanding conditions often encountered in RVs. These cables are built to handle vibrations, high temperatures, corrosion, and moisture, ensuring reliability and durability. By using properly assembled battery cables, you can have peace of mind knowing that your RV’s electrical system is in good hands.
Proper termination and connection of the battery cables are also crucial. The cables should be securely connected to the battery terminals, ensuring a solid electrical connection. Loose or poorly connected cables can lead to voltage drops, which can negatively affect the performance of your RV’s electrical system.
Choosing the correct cable size is essential to meet the power demands of your RV. Undersized cables can result in voltage losses and overheating, while oversized cables can lead to unnecessary weight and cost. It is recommended to consult your RV’s manufacturer or a qualified electrician to determine the appropriate cable size for your specific application.
Additionally, proper cable routing and protection are important to prevent any damage or wear over time. Cables should be routed away from sharp edges, moving parts, and hot surfaces. Using cable protectors or conduits can help shield the cables from external elements and reduce the risk of abrasion.
The Benefits of Proper Battery Cable Assembly:
- Ensures safe and efficient operation of the RV’s electrical system
- Prevents voltage drops and power losses
- Resists vibrations, heat, corrosion, and moisture
- Optimizes power distribution and performance
- Reduces the risk of electrical issues and failures
- Provides a reliable and durable connection
By prioritizing proper battery cable assembly in your RV, you can enjoy a reliable and well-functioning electrical system throughout your adventures. Take the time to choose the right cables, ensure proper termination and connection, and protect them from potential damage. Doing so will help maximize the lifespan of your batteries and enhance your overall RVing experience.
Preventing Battery Terminal Corrosion
Battery terminal corrosion is a common issue in RVs and can significantly impact the performance of your batteries and the overall functioning of your electrical system. To ensure optimal performance and extend the lifespan of your RV battery terminals, regular maintenance is essential.
The first step in preventing battery terminal corrosion is to clean the terminals and cable connectors regularly. Using a wire brush, gently remove any built-up corrosion from the terminals and connectors. This will help maintain a clean and solid connection, ensuring efficient electrical transfer.
To further protect your battery terminals, consider applying a corrosion inhibitor or dielectric grease. These products form a protective barrier that shields the terminals from moisture and corrosive elements. Be sure to apply a thin layer of the inhibitor or grease to both the positive and negative terminals.
Lastly, it is vital to check the tightness and security of the connections between the cables and the battery terminals. Loose connections can lead to voltage drops and diminished battery performance. Regularly inspect the connections and tighten them if necessary to maintain a reliable electrical connection.
By following these preventive measures and incorporating regular inspection and maintenance into your routine, you can significantly reduce the risk of battery terminal corrosion, ensuring optimal performance and longevity for your RV’s electrical system.
FAQ
How do I properly hook up an RV battery?
To properly hook up an RV battery, identify the positive and negative wires. Connect the black wire, which is the hot wire, to the positive terminal of the battery. Connect the white wire, which is the negative or ground wire, to the negative terminal of the battery. Make sure not to confuse these wire colors with car wiring, where black is the negative wire.
How can RV battery wiring diagrams help me?
RV battery wiring diagrams provide a visual representation of how the positive and negative wires should be connected to the battery terminals. They also show additional components and devices that may be connected to the battery. By referring to these diagrams, you can ensure that all the wires are connected correctly and that the system is wired according to the manufacturer’s specifications.
How can I differentiate between positive and negative wires in an RV electrical system?
In an RV electrical system, the standard convention is to use black as the positive or hot wire and white as the negative or ground wire. This follows the traditional house wiring color coding. However, some RV manufacturers may use different colored wires or color stripes to indicate the function of the wires. To determine which wire is positive and which is negative, refer to the RV’s wiring diagram or contact a qualified electrician.
How do I connect RV batteries in parallel?
When connecting RV batteries in parallel, connect the positive terminal of one battery to the positive terminal of the other battery. Connect the negative terminal of one battery to the negative terminal of the other battery. This allows for equal distribution of power across all the batteries in the system. Always follow the manufacturer’s instructions and wiring diagram when connecting batteries in parallel.
How do I properly ground the RV battery?
To properly ground the RV battery, securely connect the negative or ground wire of the battery to the RV’s frame or chassis. This provides a safe path for electrical current to flow in the event of a fault or short circuit. Use the appropriate gauge of wire for grounding and ensure a solid connection between the wire and the frame. Regularly inspect and clean the battery terminals to prevent corrosion and maintain a good electrical connection.
What should I do if I experience issues with my RV battery wiring?
If you experience issues such as clicking sounds or malfunctioning electrical devices, visually inspect all the battery connections for loose or corroded wires. Make sure all wires are connected to the correct terminals and that there are no crossed or incorrectly connected wires. Use a multimeter or volt-ohm meter to test for proper voltage and continuity. If you’re unsure or unable to resolve the issue, seek the assistance of a qualified electrician.
Why is proper battery cable assembly important?
Proper battery cable assembly is crucial for the safe and efficient operation of an RV’s electrical system. Battery cables are specifically designed for connecting batteries to the electrical system and withstand harsh conditions. Choose the correct cable size and type for your application and ensure proper termination and connection to the battery and electrical system.
How can I prevent battery terminal corrosion?
To prevent battery terminal corrosion, regularly clean the battery terminals and cable connectors with a wire brush. Apply a corrosion inhibitor or dielectric grease to the terminals and ensure a tight and secure connection between the cables and the battery terminals. Monitor the battery fluid levels and keep the batteries properly charged. Regular inspection and maintenance of the battery terminals can help prolong their lifespan and ensure optimal performance of the RV’s electrical system.